 (Image via
It is a moment every driver dreads. You turn the key, and instead of the familiar roar of your engine, you get a sad little click or a weak, groaning sound. Your car’s battery is dead. Whether you left the dome light on or the battery is simply at the end of its life, getting stranded feels like a disaster. This silent failure often happens at the most inconvenient times—during a rainstorm, late at night, or when you are already behind schedule. However, a dead battery does not have to result in an expensive tow or a ruined day. Understanding the physics of energy transfer and the proper sequence for a jump-start can turn this mechanical crisis into a minor, manageable delay.
Thermal Impact on Electrochemical Storage
Batteries are essentially chemical storage tanks that convert chemical energy into electrical current. Their performance is heavily dictated by ambient temperature.
- Cold Weather Resistance: In low temperatures, the chemical reactions inside the battery slow down, reducing its ability to provide the "cranking amps" necessary to turn over a cold engine. This is why batteries that seem fine in the autumn often fail on the first frost.
- Parasitic Draw: Leaving a small interior light or a trunk lamp on overnight creates a constant drain. While these bulbs use very little power, they can slowly deplete the battery’s reserve over several hours until there isn't enough voltage left to engage the starter motor.
- Component Aging: Most lead-acid batteries have a functional lifespan of three to five years. As the internal lead plates sulfate, they lose their ability to hold a charge, leading to the "weak groan" sound during ignition attempts.
Strategic Staging for Power Transfer
To perform a successful jump-start, you need a set of high-quality jumper cables and a "donor" vehicle with a healthy, functioning battery.
- Vehicle Orientation: Position the donor car close to the disabled vehicle so the cables can reach both batteries without being stretched tight. Ideally, the cars should be nose-to-nose or side-by-side, but ensure they are not physically touching, as this can create an unintended electrical ground.
- Pre-Connection Safety: Turn off the ignition on both vehicles. Ensure both cars are in "Park" and the parking brakes are firmly engaged. This prevents any accidental movement during the process when you are focused on the engine bay.
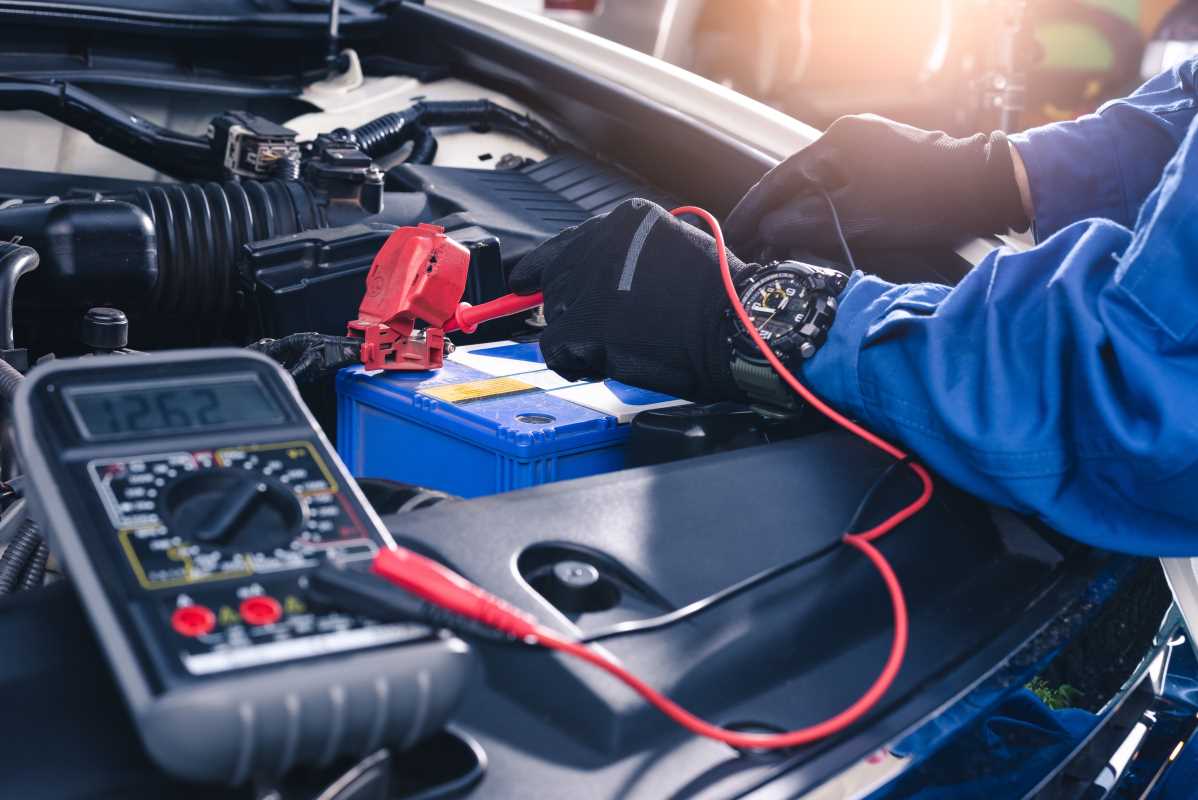
- Terminal Identification: Locate the positive terminal (usually marked with a red cap or a "+" sign) and the negative terminal (marked with a "-" sign). If the terminals are covered in white, ashy corrosion, use a stiff brush or a rag to clean them, as this buildup can block the flow of electricity.
The Standard Connection Protocol
The sequence of connecting the cables is the most critical part of the process. Following this "Red to Dead" order minimizes the risk of short circuits or dangerous sparks.
- Positive to Dead: Attach one red clamp to the positive (+) terminal of the dead battery.
- Positive to Donor: Attach the other red clamp to the positive (+) terminal of the donor car’s battery.
- Negative to Donor: Attach one black clamp to the negative (-) terminal of the donor car’s battery.
- The Ground Connection: Attach the final black clamp to an unpainted metal surface on the engine block or frame of the dead car. Do not attach it to the negative terminal of the dead battery, as this can cause a spark near potentially explosive battery gases.
Energy Transfer and Ignition
Once the connections are secure, you are ready to transfer power from the healthy system to the depleted one.
- Charging Phase: Start the engine of the donor car and let it run at a fast idle for three to five minutes. This allows the donor car’s alternator to pump a "surface charge" into the dead battery, making the actual start attempt much easier.
- The Start Attempt: Attempt to start the dead vehicle. If it fires up, let it run. If it fails to start, wait another five minutes to allow more energy to transfer and try again.
- Alternator Verification: Once the dead car is running, if the dashboard "Battery" light stays on or the car dies again as soon as you disconnect the cables, the problem is likely a failing alternator rather than a simple dead battery.
Safe Disconnection and System Recovery
Disconnecting the cables must be done in the exact reverse order of the connection process to ensure safety.
- Reverse Order: Remove the black clamp from the grounded metal, then the black clamp from the donor car, followed by the red clamp from the donor car, and finally the red clamp from the dead car.
- The Recharge Drive: This is the most important post-jump step. You must keep the newly revived engine running for at least 20 minutes. Driving the car at highway speeds is the most efficient way for the alternator to recharge the battery. If you shut the engine off immediately, the battery will likely not have enough power to start the car a second time.
Financial Comparison: DIY vs. Roadside Assistance
Learning this skill provides immediate financial benefits and prevents unnecessary service fees.
| Service Option | Estimated Cost | Time Investment |
| Professional Jump-Start | $75 – $125 | 45 – 90 Minutes |
| DIY Jump-Start | $0 (if you have cables) | 10 – 15 Minutes |
| New Battery Purchase | $120 – $220 | 20 Minutes |
| AAA / Roadside Membership | $60 – $100 (Annually) | Varies |
- Cost Avoidance: A single out-of-pocket jump-start from a towing company can cost as much as a brand-new battery. By performing the jump-start yourself, you save that service fee and can put that money toward a high-quality replacement battery if needed.
- Portable Alternatives: If you frequently travel alone, consider investing in a portable lithium-ion jump starter. These devices cost between $60 and $120 and allow you to jump-start your own car without needing a donor vehicle.
Identifying Permanent Battery Failure
While a jump-start solves the immediate problem, it is often a sign that the battery is nearing the end of its life. If you experience multiple dead batteries in a single week, or if you notice the battery case looks bloated or "swollen," it is time for a replacement. Modern diagnostic tools at most auto parts stores can test your battery’s health for free, giving you a definitive answer on whether the unit can still hold a reliable charge.
By mastering the jump-start process, you transition from a stranded motorist to an empowered owner. This simple set of steps ensures that a minor electrical glitch does not turn into a major logistical and financial setback.
- Disclaimer: Batteries contain corrosive acid and can emit explosive hydrogen gas. Always wear eye protection and exercise caution when working around an engine. This information is for educational purposes. Consult your vehicle's owner's manual for specific battery location and safety instructions.
Articles on affordableautomotiveservice.com are for informational purposes only and do not provide professional or legal advice. Consult an expert before making decisions. We are not responsible for actions taken based on this content.

.png)